Monday, December 30, 2013

Visions of sugar plums....pebble rugs

Okay it wasn't really sugar plums, but I did envision a cool new handmade pebble rug in my craft room.
image from www.shelterness.com
have you seen these rugs, they are so cool. Over Thanksgiving I felt one first hand(foot) at my sister-in-laws. Oh it was so soft and awesome, it just made your toes curl to walk across it.

Now being a crafty individual, I thought Mm.... I could make this. I did the research , I do know how to wet felt and if that didn't work then I would make really big yo-yo's out of felt then wash, dry and sew together. It did sound feasible.

Yeah right! I started with a  lovely big bag of assorted brown and cream alpaca fleece.  I rolled and mushed soap over my stones creating pebbles just the right size felting them down to the desired shape. My thought was start small in rug size and grow as I found the time. I had this bright idea to wet felt all my stones then, run them through the washer and dryer to finish the felting process. Sounded good until I tried it.
 What happens when you try and felt  alpaca pebbles in a net bag. Oh what a mess!

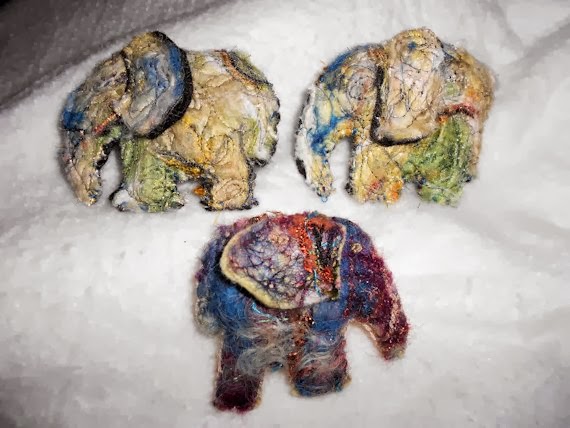
Some times good ideas late in the day doesn't come out all the way like you planned. After I wet felted my (I should note my fleece was unprocessed, maybe that was the problem) pebbles I placed them in a netted bag and tossed them into the washer to rinse out the soap. Possibly this could have been my first mistake. Some felted up great stayed in shape made really cool  felted rocks. But the majority totally went the opposite direction and made matted creatures of unknown dimensions. They would be cute if I added in eyes and gave them a little hair cut. These were NOT the cool fun felted pebbles I envisioned.
Can you see the white cording, all twisted and knotted in the matted fleece?
What caused them not to stay together I am not sure. Maybe it was the netting and it pulled the fibers out of the bag. There was a few surprises in my alpaca fleece. I had purchased it a few years ago at a music/craft festival. Was told it was unprocessed and would have vegetable matter in it. It did. Plus a few bunny droppings too.
So your asking; did it make pebbles, Yes it did. But not as many as I had thought I had felted, some I had to did around for, some shrunk, which is good, some flattened out, there are flat rocks, some just dissolved into the matted creatures and others are just odd.

I will try the big felt yo-yo's and see how they come out. This was an experiment, A little success yes, no failures when it comes to creating something handmade. I have enough to make a mug rug or pot holder. We will see.
Hairy yes, but a hair cut and re felting may be in order. but stone like nevertheless.
bunny by-product.

HAPPY NEW YEAR 2014 !!!!
-TNfrmgrl

Thursday, December 12, 2013

New clutches, pendants and more

It's been  awhile since I checked in. I almost cannot believe that in two weeks it will be Christmas.
This year has flown by. Where it went I have no idea.

Here a  few new pendants I have working on. These are made from zinc disc, sari silk ribbons & beading.
Really easy to make, just wrap the ribbon, secure with glue, then embellish. On the last one on the right I used Mod-Podge on the ribbon, it really stiffened it up.
The pink one has an alcohol ink charm and  free form hand embroidery. The middle one I just beaded in blues and gold.


Here  is a few items I have needle felted over the last few months.  The small grey purse is actually a phone or nook purse. its small shape is ideal for all our on the go gadgets.


This piece was actually made into a clutch, it is called Chocolate and berries for the colors I used in needle felting it.


This is one of six tea bag carriers.
 Called 'Sweet Tweets' tea wallets. Other colors available on my Etsy site.


These two are sari ribbon business card holders, sewn not needle felted. They would also hold your credit cards, and more. 


Anyway that's what i have been up to lately. Merry Christmas.
-TNfrmgrl

Monday, October 7, 2013

Paper Beads & Bracelets

Do you remember making paper beads as a child? My grandmother showed my cousins and I how to roll magazine strips of paper around toothpicks and glue together with flour paste. I don't remember what she used to give them the shiny look, but we all had fun wearing our 'Indian Beads' as she called them.

Forty years later and I am making paper beads again. it is really addictive once you get started. I have loads of scrape booking paper some which is really good for making beads, other like card stock is only so-so good as you have to roll it tightly to get it smooth and card stock does not roll very well.

The above picture shows some different styles of paper used to make beads. Magazines and old books are ideal for bead making (if you use old book you may have to line you page with a white sheet of paper if too thin.) Card-stock makes chunky, not really round beads but very heavy and boxy looking beads. Artisan papers like homemade papers really soak up the glue and Mod -Podge used as a sealer(light green and silver ones shown).
To make paper beads you need to have a 1/4 dowel , scissors, Elmer's clear school glue, small clothes pins(optional) pattern for tube or cylinder beads My pattern shown below is 9' long, 1" wide at one end, and 1.25 inches at the other. It is marked at 7" for use with  card stock. I cut my pattern out on a heavy cardboard for repeated use and durability.
After trial and error I found that if roll your paper from the small end your sides of the bead will funnel inwards , I like this shape better. But either side is an option, try both and decide for your self. Also, from doing it from the small side  it makes a nice rounded hole for beading, as the bead will fit into the end nicely as shown in the picture below.
After making the beads its time to glaze them with either Mod-Podge or spray on Acrylic.
I like the Mod-Podge as I can layer on the coats, I paint them on and let dry for 24 hours before strings them.the picture above is self explanatory on how to paint on the Mod-Podge and how I dry them. Note: after the glaze dries clear and before taking them off the dowels, rotate them to make sure they were all coated well. If not re-glaze and continue drying.   
After they are completely dry it is time to make them into necklaces or bracelets. Necklaces are the easiest as you can just string them on until you get it the length you want. Bracelets can be made this way to, just use a rubber band style cording to make them fit . 

I like the style shown above as it connects together using a wand and loop closure.I added beads to give it some oomph and bling. You can watch how to put them together on this you-tube video.http://www.youtube.com/watch/?v=JXMhcZADr-Y

To bead I just followed the same path as above, just added a bead on each end. then I went through and stitched in-line one more time to help keep the shape. 
There are many great ideas for using homemade paper beads on Pinterest and on the web. 
Have fun, until next time

-TNfrmgrl
                                                                                                                                                                                                                                                                                                                                                                                                                                                                                                                                                                                                                                                                                                                                                                                                                                                                                                                                                                                                                                                                                                                                                                                                                                                                                                                                                

Friday, September 20, 2013

Needle Felted Brooches

It's that time again when I ramp up my stock on items to sell in my Etsy shop.
Lately it seem that everyone is wanting fun brooches to wear. I have been in over drive to get Fall and winter ones made.
First came the pumpkins, these like the others were needle felted first them machine free stitched, before stuffing and sewing together.


Next came the the Owls , I made about twelve of them. It was a lot of fun inking the washers for the eyes and choosing which owl they would go onto. The washers really brought personality to them.
 Then came the Christmas trees.  I still have a request in for hearts, shamrocks (maybe) and something for Easter.


I also made up a couple of smaller wallet style clutches. This one is in Autumn colors the other (not shown ) is more wintry.


Below are a few more brooches that I have made over the last year. To the right is a Redbird sitting on a velvet cushion.


Piggies, because who doesn't like little pink pigs.
 These are probably my favorite, the Bluebirds.

And of coarse the Elephants. They were the first I ever made, they have a lot of personality, I think...


This one more small pouch I made a few months ago, the colors remind me of Old Gold and Victorian Rose.It would be the perfect size for a slimline camera. It also has a foam padding inside that could help if you did use it for a camera case.


-TNfrmgrl

Tuesday, September 10, 2013

Have A Boll


Did ya know that Tennessee is known for it's cotton crops. According to a local publication it one of the nations top upland cotton growers, providing up too 95% of the US cotton production. 
The southern part of our state has many farms that still grow this staple.

A few weeks ago I discovered cotton roving,ya know the stuff they make thread from. I had never actually seen it until now. It looks just like the cotton you pull from your medication bottles. Except its is brightly colored ,a little more soft and comes in really long skinny batts (actually this is how you find it in the medicine bottles too..ha..ha..).
From left to right the colors are Pansy Gardens,Blue Waves and Meadow

From the feel of it I knew that it would felt differently than regular wool roving or fleeces.It had no poof like other wool, which makes sense as wool roving/fleeces is hair from an animal and this was plant matter.
This picture taken from cover of'
Tennessee Home and Farm  Fall 2013' magazine
It almost does look and feel just like what you see in this boll. Except of coarse that the black seeds have been removed ,the cotton has been dyed.& processed.
It needle felted flat. Which I think will make interesting landscape pictures.

It also, kept its puncture marks where the needle(s) went in. Regular wool will re-poof and close back up. It will be interesting to see how it felts with other types of roving/ fleeces. 

Typically, it is sold as cotton roving to make yarn/thread through spinning. But I like trying interesting products in my fiber art , you never know where a wonderful gem will turn up. This could be it. I have some new colors ways on order, and plan on making a couple of landscapes before adding it into my purse making. 

My supplier did note that that it is not colorfast(colors may bleed when wet), so it probably wouldn't work well in my clutches unless I can fix this issue. 
If your looking for a new product to try , give this one a shot. I purchased it from 
www.robinjedmundson.etsy.com

As always have fun, and  Be Unique...Be Inspired... Be Yourself
-TNfrmgrl

Thursday, August 22, 2013

Bracelets, Washers & New Clutches

Okay, Sorry about it being so long between posts, somehow I was locked out of site and it has taken me until today to figure out how to get back in.


A couple of new clutches have been created in the last few weeks. The Jungle Boogie Giraffe Clutch.


And this one that is still unnamed.
I have also been working on bracelets for this fall, made from patches of crazy quilted fabric.


These bracelets will have snap, button or elastic to hold them on. Still working out the dynamics of it all.They will also be embellished up with buttons, beads, stitchery etc.


Some fun new alcohol inked and
glossed washers have made it in to the mix of things I have been working on. These are some of my favorites, as the inks on them have created some really cool effects. I researched loads of tutorials on using these inks before I actually started using them. Many had the same cool star-burst or blotchy spot effects. But after playing with them They are easily versatile if you can work with them quickly, creating different designs in the inks. some of my favorite choices are using metallic additives and glitter glue mixed in with the inks. Also canned air is a wonderful tool to dry some areas faster while others are still wet.  Normally my necklaces are wire wrapped with beading, however these are so cool on their own, I think I will just paper the back and call them done.

Look for the bracelets getting done in the next post.
As always enjoy,
-TNfrmgrl

Monday, July 29, 2013

Big Beaded Earrings and Dispaly

Are you a multi-crafter? Doing more than one thing at a time, or love ALL crafts? I DO! This weekend I was making Big Beaded Earrings. Hubby asks if I am going to sell them on my shop. I replied 'Well I think I would have some competition as there are over 300,000 + already there. No honey, these are just for me' :) Love interactions like that.
I did tell him, maybe I would sell them at craft shows. Who knows.

Made this cute hanger from a paper style luggage container and some wire. It will make a great craft fair display. Actually have several of this style in different sizes and patterns. They were given to me as a gift, never really knew what to use for until now. I will probably add another row of wire. It was just wrapped and tied inside, very easy to do.You could wrap it all the way around and have a double sided display.However, you wouldn't be able to stash over stock inside.

Earrings are Victorian in colors, looks very  circa 1800 against the tote.

Just something fun for Monday.

-TNfrmgrl

Sunday, July 28, 2013

Putting up Pickles


Though not necessarily a craft, it defiantly is an art to learn how to can your own homegrown foods. This weekend we put up several jars of homemade pickles. YUM!

 The ones on the left and here in the large picture are from a recipe found at 
Ball Canning & Recipe site http://www.freshpreserving.com called Kosher Dill Pickle Chunks. They used the Ball Kosher Dill Pickle Mix, smelled very yummy while heating up, hope they taste as well as it smelled.The brine is very light golden almost clear yellow.


 The ones shown here on the right are Garlicky Dill Pickles Spears. A general recipe that was a combination of several I had but were basically the same. The had a hand mixed spice mixture added to each jar of garlic cloves, red pepper flakes, dill seed and peppercorns.  With a  cider vinegar, salt & water brine. This brine was deep dark golden. I didn't have black peppercorns, so I used a mixture of red/black/green. Don't know if it will make a huge difference, but they sure look pretty in the jars.

Only had one small incident , one of my pint Garlicky Dill jars busted the bottom out when placed in the water bath.  It was hard loosing all the small pretty cucumbers, but safety first. I had checked all my jars when I washed them, but sometimes you just never know when one will crack.
I ended up with 4 quarts, and three pints all together. Enough for my pickle habit and to share. 

We picked a few more blackberries(last of the season), will make cobbler from these. Peppers finally coming on. The corn, if we can keep the coons from wreaking havoc on it may finish making in the next week or so. One was caught and transplanted to the other side of the mountain last night , but we know were there is one the are probably more. 
-TNfrmgrl

Friday, July 26, 2013

R& R Part 2 : Heading toward the end

Working on getting these wall hangings made. This week has been focused on making the hangers for the 'Bluebird' piece and a smaller  abstract one that hangs on my inspiration board.

I choose to wire wrap my Rose of Sharon twigs after they dried out for several days.  The 'Bluebird' hanger is about 17" long and made up of 4 twigs.It is wrapped with a tarnish resistant copper core #22 green  wire.  Wiring is only in the center of twigs, leaving about 5' open on the edges to hang other embellishment on.
This piece is the smaller piece unnamed as of yet, that hangs on my inspiration board. it was a wrapped with a nickle plated copper wire #26 multiple times and beaded with 4 glass beads in brown and teal. its back is was left unfinished so the needle felting is seen on both sides, however wool base is very thick so the felting is light. hanger is about 9" and the NF piece is about 7" wide.


The 'Fire & Ice' is not finished as of yet. I have been looking for a frame that will be suitable for it. I really wanted it to be rustic , finding one has been difficult  so I am leaning toward making my own. Possible woods I am looking at are Tulip, Walnut and or Cedar.  Cedar is a good choice, it naturally repels moths  making it a great  wood for wool based fiber arts. Tulip has a cool smooth light toned bark, where as Walnut has a nice ripple effect in larger branches, smaller ones have a slight ripple but not as defined as a more mature branch. there are loads of choices to chose from at the farm so we will see what we can find.


Back to the 'Bluebird' piece stitching was done to reattached the wool to the reverse side and cover the stabilizer. I machine stitched using a free stitch pattern all the way around then trimmed as needed.
a sleeve  was hand stitched on the back to attach it to the hanger with several pieces on twisted wire.


Next I added embellishment fibers to keep with the bird nest theme. These were hand-stitched in a random pattern, knotted and beaded in places along the top and sides.
The twig hanger was attached.


Finished attaching the hanger to the piece, added a few more hidden beads. Simple but I like it.

Stay tuned for the "Fire & Ice' fiber art wall hanging as I'll post when I get it finished. this ends the 
Re-purpose and Recycle post , at least for now.           -TNfrmgrl

Monday, July 22, 2013

Re-purpose and Recycle Part 1 1/2

I know your thinking, what has taken me so long to get on with this project.I didn't forget or put it on the back burner. Thus, that's why this is named Part 1 1/2.
It has rained and stormed for the last several days here in the south. I checked the grape vine today to see if there were any old pieces I could harvest, it may be fall before it stops growing out of control and I can harvest it. Much too green for now. I did however clips some branches from my Rose of Sharon shrub/tree. This is cool wood, straight but loads of knots and knobs that will catch the fibers I want to attach to them. They are drying out as we speak.

I was playing around with the 'fire and ice ' piece today along with a 11' x 14 " wooden frame and some #8 Perle thread in turquoise and came up with this. The strings do need to to be much tighter, and is  NOT done by no means but its a work in progress. Thinking about drilling holes in frame and using washers or buttons to help tighten  it up. Should I paint the frame? Plus I am not sure on what to do with the bottom edge, should the stringing be all the way around it ? Or leave the bottom loose?

Just thinking aloud or out side of the box.

Hmm, ideas are a working.


I cut around the 'blue bird' piece but in disassembling it the wool back came off and the cheap stabilizer I had sandwiched between it had become a grainy mess. It will need a new piece before adding a back on to it. Lesson learned cheap is not better, stick to the good stuff, or at least better quality.

Thinking of using the branches I clipped today; I like the  image of birds, nest and branches. Plus there is lots of woodsy undertones in the fibers used in it.

So I'll get back to it. Part 2 coming soon. Stay tuned.

-TNfrmgrl

Friday, July 19, 2013

Re-purposing & Recycling Part 1

Today we are recycling and re-purposing old clutches and journal covers into wall art.Sounds like fun. 
The greatest part about using wool in a base for needle felting is as any holes that are present from snaps, stitches etc. easily close back up with a gentle scratch-n-tug to the fabric. 
Today I have chosen three clutches  and one journal cover to turn into wall art. 

First, I had to take out all the side stitches. sounds easy , but as I got going I remembered I did multiple rounds of stitching with the machine, before  adding in the hand stitching. I finally got the clutches undone, and the snaps removed. Yeah! 
You can't even see where the holes were. that was the goal. 
Removing the blanket stitching was done with just a snip and tug with  each vertical stitch, the machine stitching I cut the stitches in a couple of places then pulled the layers apart. I wasn't worried about stretching out their base shape of the wool as this will all add to the wall art when I am done.


   This one will be a little harder as I want to keep the decorative stitching around the edges. when I took it apart I left the bottom  hand stitching and will re-stitch the side and top. Plus on the reverse side , though not shown is black wool with metallic orange thread free stitches in a vertical pattern, so keeping the layering is important to this piece.


This piece like the one above, is unique too. This one was made using recycled threads from furniture fabrics plus fun embellishment yarn fibers. Its like one large nest with five little wool blue birds hidden in its mass. On this one I don't want to keep the straight edges, so I will be following the edges of the fibers to dictate where I cut. making it a more abstract form.


As for the other two pieces, the black/green and the rectangle yellow I haven't yet decided what to do with them. 
Stay tuned for the next blog as we begin getting the items together to make them into wall art. 
If you have made fiber wall art I welcome your suggestions and comments for making frames and stitching them in place. I am thinking of using pieces of old grapevine as it has awesome texture and color. 

Look for more pictures and notes as we recycle  and re-purpose  in part 2 of this entry.

-TNfrmgrl

Monday, July 15, 2013

Blackberry Jam

We tried to pick blackberries yesterday. Our briers are burning up faster then we can get our fruit picked. But I was able to get about half a gallon, making about 10 half pints of jam. My mother-in-law had picked about 2 gallons a week ago. she was able to make a cobbler and nine half pints of jelly and still have some for general eating.  I waited too long.(sigh)
In this picture you can see that there is still loads of fruit, red and trying to ripen. what black ones we didn't pick were hard and drying out. Bitter in flavor. They say blackberries need sunlight and water to make the sweetest berries. We find this to be true. I would like to pick one more time, but without any rain our crop is bound for the birds.

Another berry patch picture
Jam all made a setting up.
My jelly if you look closely had a lot of foam in it, even after I skimmed it off. I don't think this will effect the taste,it just looks cloudy at the top of jars, however it is a bright red, and tasted good. so I suppose that's all that really matters. The hardest part is waiting as it firms up . The last time I made jam it made syrup instead. We ate it on pancakes as it drizzled like honey.
Happy berry picking if you have briers like us. Maybe it will rain some more and I'll get another picking.
-TNfrmgrl