Tuesday, January 7, 2014

Adventures in Wet Felting with a Orbital Sander

 Wet felting with a sander you say. Never heard of doing it this way. I thought this would be the perfect opportunity to show you how I did.
I was given a Ryobi CORDLESS Orbital sander for Christmas. Why cordless, well you will be working with water and to suffice you don't want to end up in the ER  or worse. In all the tutorials I read they explained this in far too technical terms.... which is great information don't get me wrong; lets just say you use a cordless sander so you don't get electrocuted.


It was surprisingly easy to set everything up. I used a plastic art table, covered in a towel and old table cloth to soak up any spills and to help with noise reduction . Things you might want to have on hand , but may or may not use.
Heavy piece of plastic(I used an old super size Hefty Ziploc bag), bubble wrap, EAR PLUGS a must,  natural bar soap, scissors, a edged shoe mat(I found mine at JoAnns  Fabric for under $5 dollars) Hot soapy water in a bottle and of coarse any roving you are using.


First I laid out my  white core roving in one direction,
when done I laid it out in the opposite direction.
 You can see by the pin in each picture the direction I was going. The second layer was a little heavier then the first, some people will  do at least three  layers , I did only two and wish now I had done three.
I used a core fiber that the store I bought it from said it was good for wet felting, It was, but it makes more of a prefelt like you see in the sheets from 'Felt Works' . Heavy and not as thin as a good Merino roving would make. For this first project it worked fine.


I then laid out my flower design. I used Harrisville and Merino roving/fleeces for this. As we continue you will see this difference in how it compared to each other when being felted. I was also loose with my design as I plan to add embellishment and free motion stitching once dried.


You can see I layered my Harrisville and Merino. Next is was to add the warm soapy water, which I squirted over the entire piece and pushed down lightly with my hands, to slightly incorporate it into the design.


I paid close attention the the flower areas with the soapy water, making sure each piece was a little wetter tan the white background.Next, the bubble wrap was applied to the top.


It is ready now for using the sander.
One thing to note, don't move your sander around  at this stage, you will create holes , tears, or move your design.


As you begin "sanding" hold in one place for a few seconds, then lift and move to a new area, continue doing so until you have passed over the entire piece once or twice, At this point, turn off sander set aside and lift bubble wrap, check on roving to see how it is felting, or if you need more water/soap mixture add now.


My sander came with a foam polishing pad which I decided to use as my sander base. If you have enough layers of plastic I don't see why you would need to use a pad at all, except for the fact it creates a nice glide as you get deeper into the felting process.
To test your felt, lightly pinch surface to see if you still have wisps
Merino roving, felted great, no wisps.

Harrisville, did not felt down all the way, this is a side effect of using this fleece, which was okay,
as I planned to create 2 D effect after it dried.
of roving or if it has felted together and you are unable to pinch the surface and have the roving come off.


I continued to check as I felted, About three or four more times before I was satisfied with how it was coming out.

It took about an hour and half before I was ready to , rinse out in sink using HOT water to finish the felting process. I then wrung it out, reshaped, and dried it in the dryer.

The sander helps replace the act of having to roll it so many times, which can be a long process. I have found Merino is the best felting finer/roving to use . It felts flat, shrinkage is about 1-2 inches all around, and you are able to iron it to reshape it.

My wall hanging is thicker than  some I have seen, due to the core wool fiber I used.
The finished hanging came out great, pretty much how I envisioned it. I think the free motioned stitching added some depth, but not too much. My poppies are a little wind blown , especially the tall one, as it was a little looser in design the the other.


This one more open of a flower, I looked at many colors of these beauties on line and I like the different shades of blues represented here.
If you try  using a sander to wet felt, have fun with it.


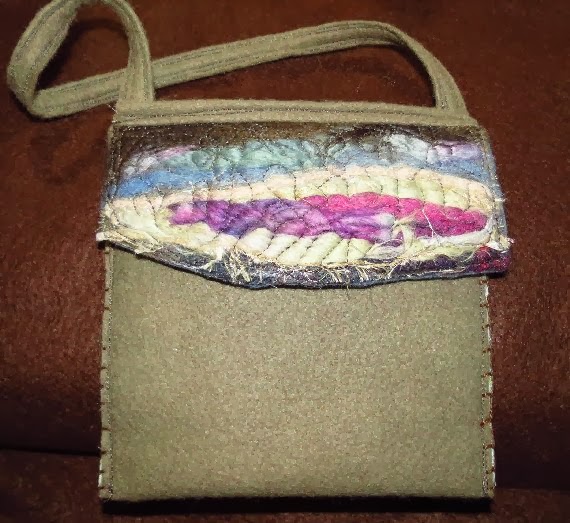
I'll leave you with one more picture, this will be a small purse when done, wet felted  w/ sander over a cardboard base so it it made a opening. In a variegate Merino wool called Daylight. (Notice the difference in thicknesses of each project and how much the Merino actually shrunk up on drying. )


-TNfrmgrl

Monday, December 30, 2013

Visions of sugar plums....pebble rugs

Okay it wasn't really sugar plums, but I did envision a cool new handmade pebble rug in my craft room.
image from www.shelterness.com
have you seen these rugs, they are so cool. Over Thanksgiving I felt one first hand(foot) at my sister-in-laws. Oh it was so soft and awesome, it just made your toes curl to walk across it.

Now being a crafty individual, I thought Mm.... I could make this. I did the research , I do know how to wet felt and if that didn't work then I would make really big yo-yo's out of felt then wash, dry and sew together. It did sound feasible.

Yeah right! I started with a  lovely big bag of assorted brown and cream alpaca fleece.  I rolled and mushed soap over my stones creating pebbles just the right size felting them down to the desired shape. My thought was start small in rug size and grow as I found the time. I had this bright idea to wet felt all my stones then, run them through the washer and dryer to finish the felting process. Sounded good until I tried it.
 What happens when you try and felt  alpaca pebbles in a net bag. Oh what a mess!

Some times good ideas late in the day doesn't come out all the way like you planned. After I wet felted my (I should note my fleece was unprocessed, maybe that was the problem) pebbles I placed them in a netted bag and tossed them into the washer to rinse out the soap. Possibly this could have been my first mistake. Some felted up great stayed in shape made really cool  felted rocks. But the majority totally went the opposite direction and made matted creatures of unknown dimensions. They would be cute if I added in eyes and gave them a little hair cut. These were NOT the cool fun felted pebbles I envisioned.
Can you see the white cording, all twisted and knotted in the matted fleece?
What caused them not to stay together I am not sure. Maybe it was the netting and it pulled the fibers out of the bag. There was a few surprises in my alpaca fleece. I had purchased it a few years ago at a music/craft festival. Was told it was unprocessed and would have vegetable matter in it. It did. Plus a few bunny droppings too.
So your asking; did it make pebbles, Yes it did. But not as many as I had thought I had felted, some I had to did around for, some shrunk, which is good, some flattened out, there are flat rocks, some just dissolved into the matted creatures and others are just odd.

I will try the big felt yo-yo's and see how they come out. This was an experiment, A little success yes, no failures when it comes to creating something handmade. I have enough to make a mug rug or pot holder. We will see.
Hairy yes, but a hair cut and re felting may be in order. but stone like nevertheless.
bunny by-product.

HAPPY NEW YEAR 2014 !!!!
-TNfrmgrl

Thursday, December 12, 2013

New clutches, pendants and more

It's been  awhile since I checked in. I almost cannot believe that in two weeks it will be Christmas.
This year has flown by. Where it went I have no idea.

Here a  few new pendants I have working on. These are made from zinc disc, sari silk ribbons & beading.
Really easy to make, just wrap the ribbon, secure with glue, then embellish. On the last one on the right I used Mod-Podge on the ribbon, it really stiffened it up.
The pink one has an alcohol ink charm and  free form hand embroidery. The middle one I just beaded in blues and gold.


Here  is a few items I have needle felted over the last few months.  The small grey purse is actually a phone or nook purse. its small shape is ideal for all our on the go gadgets.


This piece was actually made into a clutch, it is called Chocolate and berries for the colors I used in needle felting it.


This is one of six tea bag carriers.
 Called 'Sweet Tweets' tea wallets. Other colors available on my Etsy site.


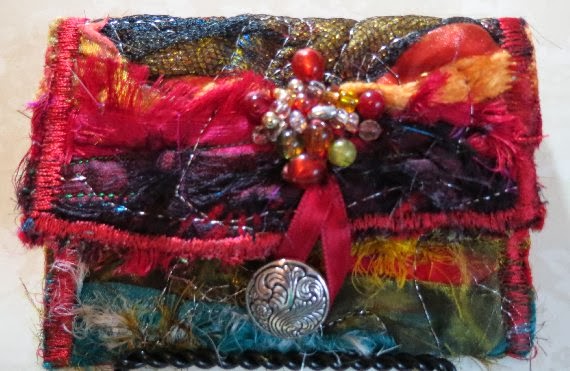
These two are sari ribbon business card holders, sewn not needle felted. They would also hold your credit cards, and more. 


Anyway that's what i have been up to lately. Merry Christmas.
-TNfrmgrl

Monday, October 7, 2013

Paper Beads & Bracelets

Do you remember making paper beads as a child? My grandmother showed my cousins and I how to roll magazine strips of paper around toothpicks and glue together with flour paste. I don't remember what she used to give them the shiny look, but we all had fun wearing our 'Indian Beads' as she called them.

Forty years later and I am making paper beads again. it is really addictive once you get started. I have loads of scrape booking paper some which is really good for making beads, other like card stock is only so-so good as you have to roll it tightly to get it smooth and card stock does not roll very well.

The above picture shows some different styles of paper used to make beads. Magazines and old books are ideal for bead making (if you use old book you may have to line you page with a white sheet of paper if too thin.) Card-stock makes chunky, not really round beads but very heavy and boxy looking beads. Artisan papers like homemade papers really soak up the glue and Mod -Podge used as a sealer(light green and silver ones shown).
To make paper beads you need to have a 1/4 dowel , scissors, Elmer's clear school glue, small clothes pins(optional) pattern for tube or cylinder beads My pattern shown below is 9' long, 1" wide at one end, and 1.25 inches at the other. It is marked at 7" for use with  card stock. I cut my pattern out on a heavy cardboard for repeated use and durability.
After trial and error I found that if roll your paper from the small end your sides of the bead will funnel inwards , I like this shape better. But either side is an option, try both and decide for your self. Also, from doing it from the small side  it makes a nice rounded hole for beading, as the bead will fit into the end nicely as shown in the picture below.
After making the beads its time to glaze them with either Mod-Podge or spray on Acrylic.
I like the Mod-Podge as I can layer on the coats, I paint them on and let dry for 24 hours before strings them.the picture above is self explanatory on how to paint on the Mod-Podge and how I dry them. Note: after the glaze dries clear and before taking them off the dowels, rotate them to make sure they were all coated well. If not re-glaze and continue drying.   
After they are completely dry it is time to make them into necklaces or bracelets. Necklaces are the easiest as you can just string them on until you get it the length you want. Bracelets can be made this way to, just use a rubber band style cording to make them fit . 

I like the style shown above as it connects together using a wand and loop closure.I added beads to give it some oomph and bling. You can watch how to put them together on this you-tube video.http://www.youtube.com/watch/?v=JXMhcZADr-Y

To bead I just followed the same path as above, just added a bead on each end. then I went through and stitched in-line one more time to help keep the shape. 
There are many great ideas for using homemade paper beads on Pinterest and on the web. 
Have fun, until next time

-TNfrmgrl
                                                                                                                                                                                                                                                                                                                                                                                                                                                                                                                                                                                                                                                                                                                                                                                                                                                                                                                                                                                                                                                                                                                                                                                                                                                                                                                                                

Friday, September 20, 2013

Needle Felted Brooches

It's that time again when I ramp up my stock on items to sell in my Etsy shop.
Lately it seem that everyone is wanting fun brooches to wear. I have been in over drive to get Fall and winter ones made.
First came the pumpkins, these like the others were needle felted first them machine free stitched, before stuffing and sewing together.


Next came the the Owls , I made about twelve of them. It was a lot of fun inking the washers for the eyes and choosing which owl they would go onto. The washers really brought personality to them.
 Then came the Christmas trees.  I still have a request in for hearts, shamrocks (maybe) and something for Easter.


I also made up a couple of smaller wallet style clutches. This one is in Autumn colors the other (not shown ) is more wintry.


Below are a few more brooches that I have made over the last year. To the right is a Redbird sitting on a velvet cushion.


Piggies, because who doesn't like little pink pigs.
 These are probably my favorite, the Bluebirds.

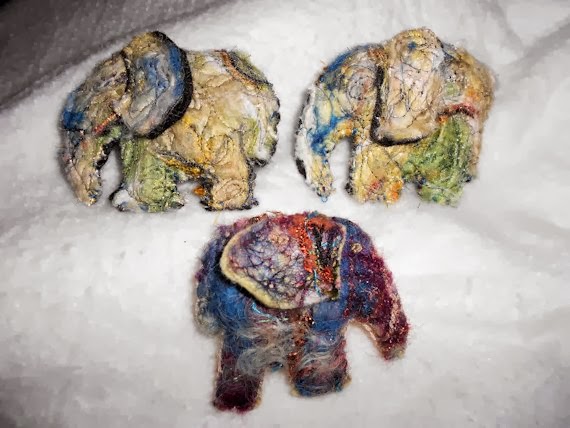
And of coarse the Elephants. They were the first I ever made, they have a lot of personality, I think...


This one more small pouch I made a few months ago, the colors remind me of Old Gold and Victorian Rose.It would be the perfect size for a slimline camera. It also has a foam padding inside that could help if you did use it for a camera case.


-TNfrmgrl